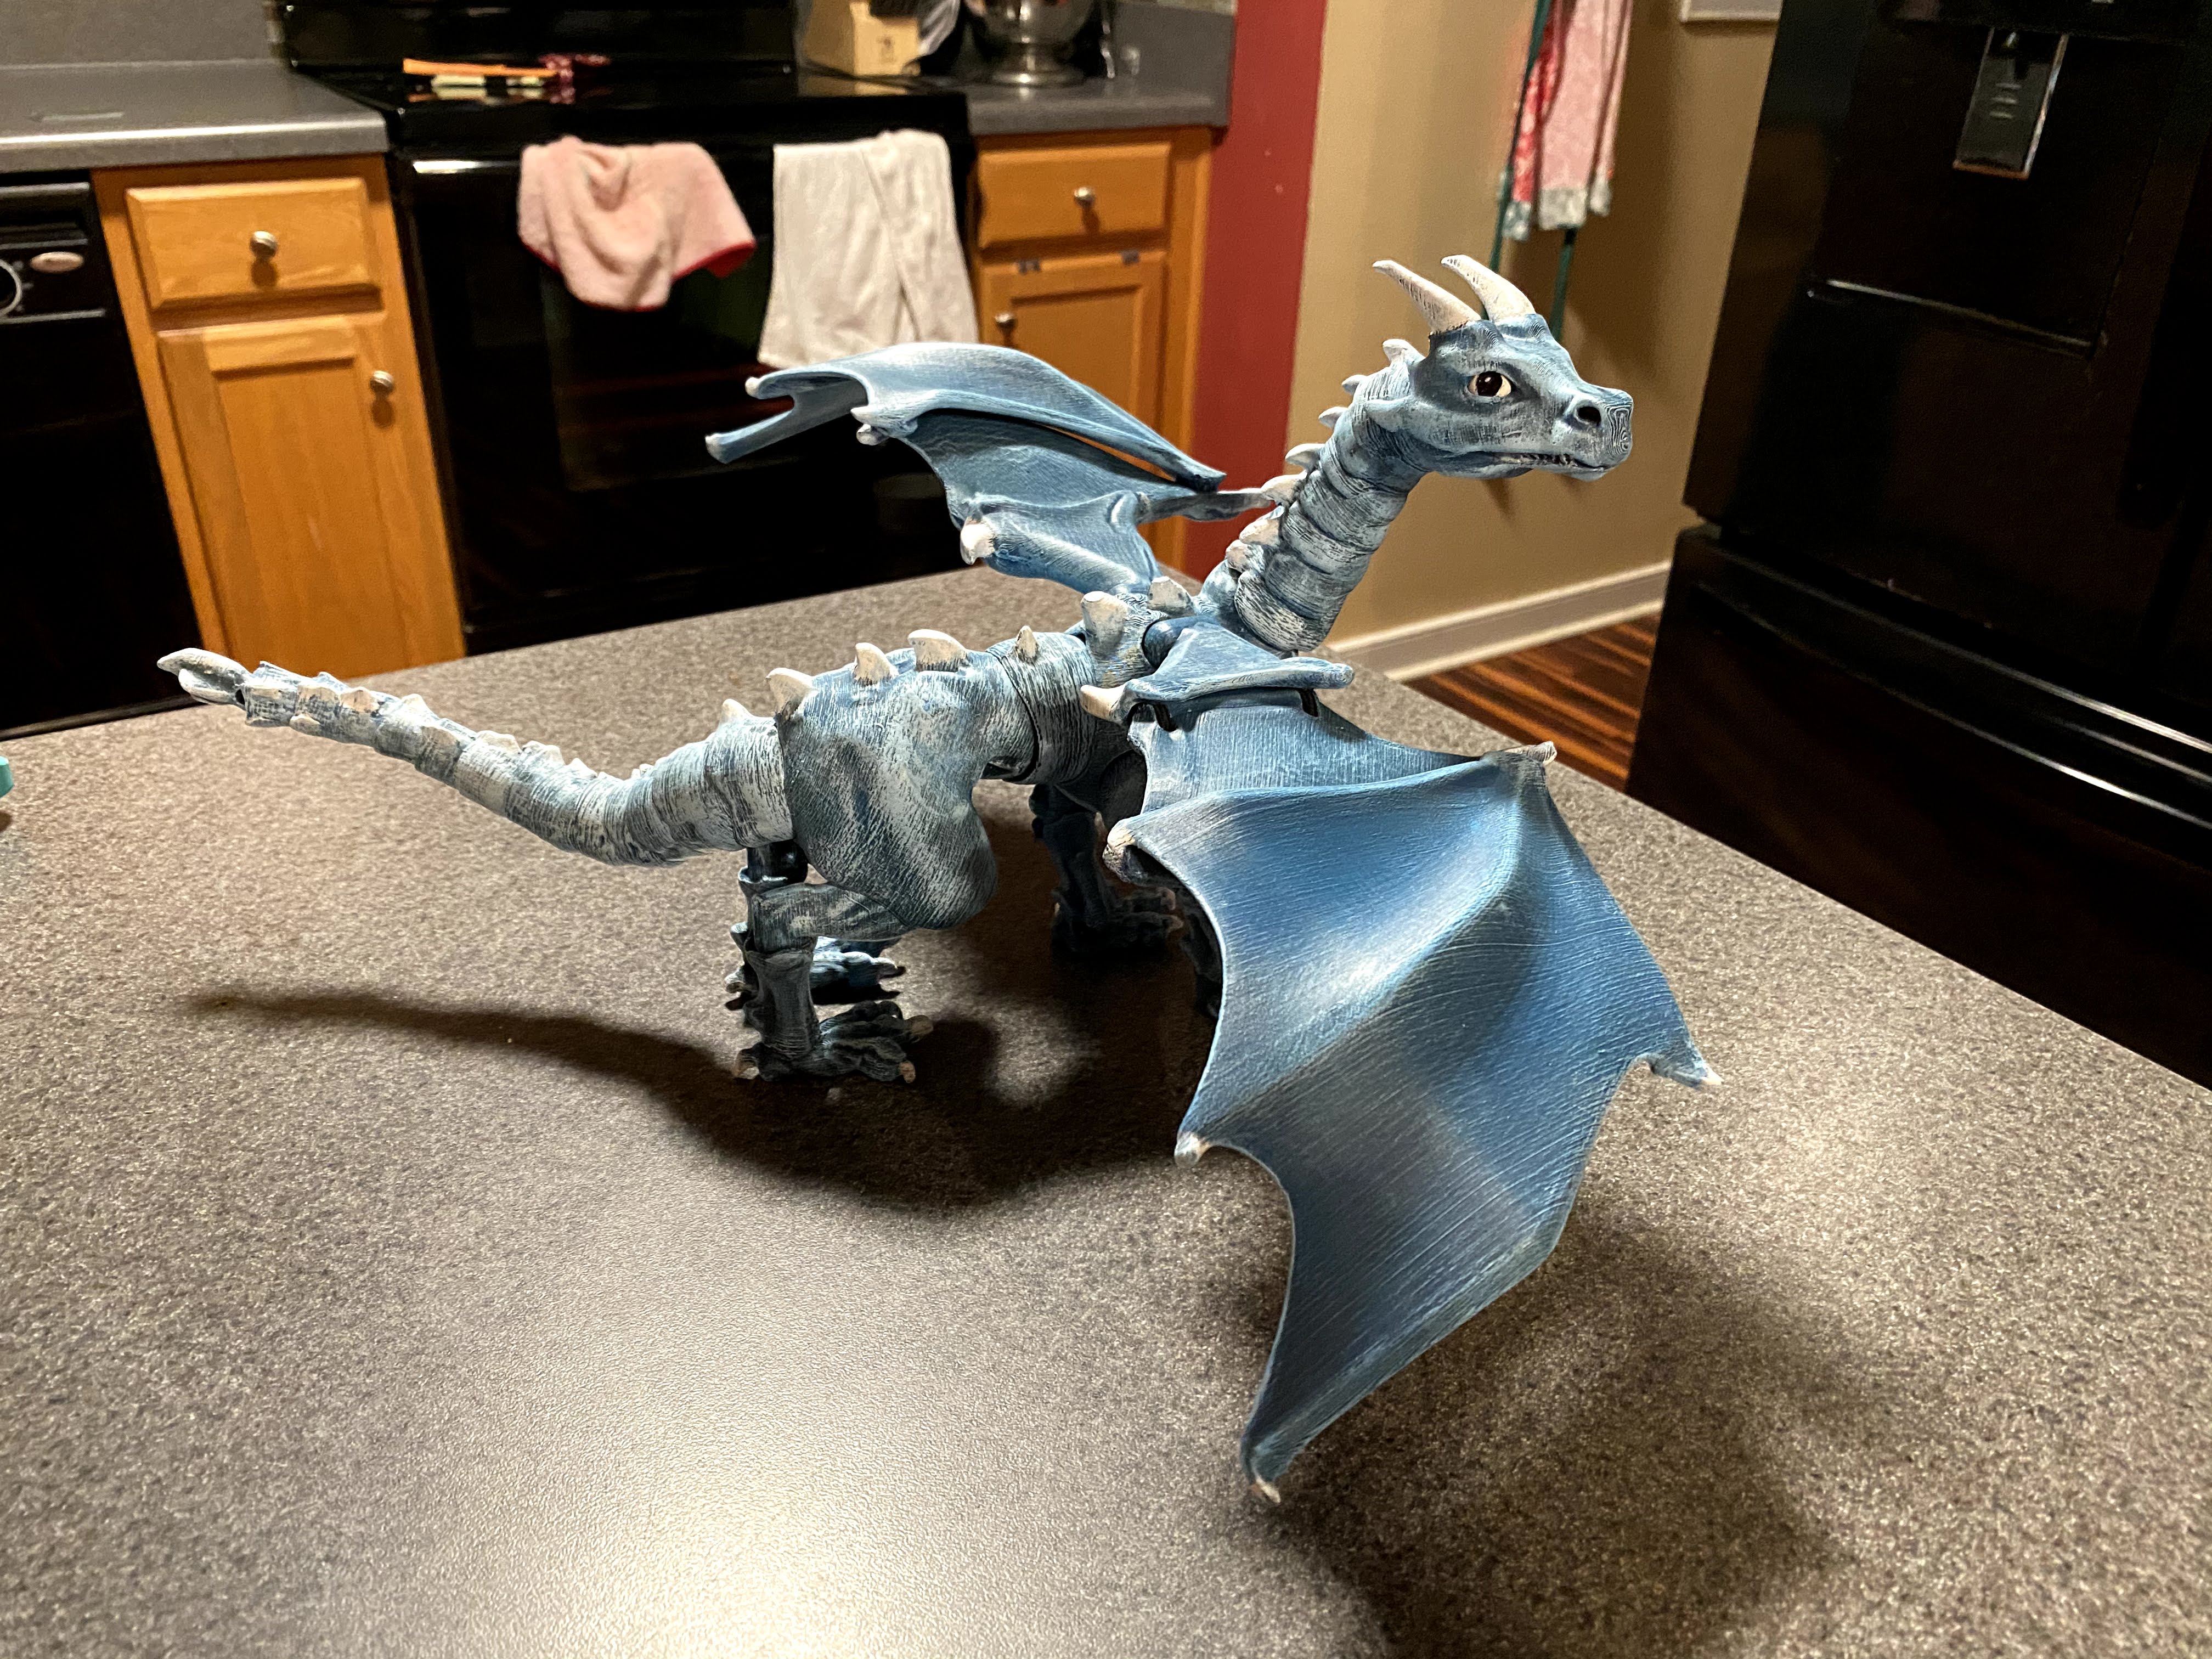
Last Christmas, I created a 3D printed, fully articulated dragon as a present for my mom. It was received well and she ranked it as one of her top presents she’s ever received. While I didn’t surpass the pony she got when she was a kid, I’ll take a top rank any day! I decided to post about this project as it took quite some time to create. I started in October 2019 and finished it a few days before Christmas 2019. I wasn’t planning on painting it as I thought I had enough filament, but, well… I don’t want to spoil the surprise!
My mom has always been a fan of dragons. Not the snake-like lindworm, or the long dragon. The full fledged, large winged, classic dragons. The ones that soar through the skies imposing fear on all that fall within its shadow. The type that sits upon a mighty hoard of treasure waiting for a hero’s futile attempt at taking it. The mighty dragon. So, when I came across the 3D printer at work and learned to use it, I immediately thought of printing something grand.

Honestly, the thought of printing a fully articulated dragon did not immediately cross my mind. After trying my hand at OnShape and TinkerCAD to build a small organizer, I came across Thingiverse! Thingiverse is a semi-open source holding for 3D printable object models. Some things on there are free and others are paid. It’s a great resource if you want to try printing something but lack the skills necessary to create a 3D model yourself. Anyway, while perusing the site, I came across Braq! This looked pretty simple to print and easy to assemble. With, what, only 42 pieces? Should be a piece o’ cake, right? The assembly instructions are on the official site of the designer’s and are pretty clear on how to assemble the entire thing. So, I downloaded the files, sliced them up, and started printing.
For those new or unfamiliar with 3D printing, I’ll go over the steps involved in greater detail in some follow up posts. The process is rather simple though. You get or make a 3D object file (typically a .STL or .OBJ file), you use a Slicer to convert that file into something a 3D printer understands (typically a .gcode file). Load that file into the 3D printer then print it. Easy peasy. The complications and complexity are mainly with the 3D printer settings and filament choice. I’ll dive into that later though.
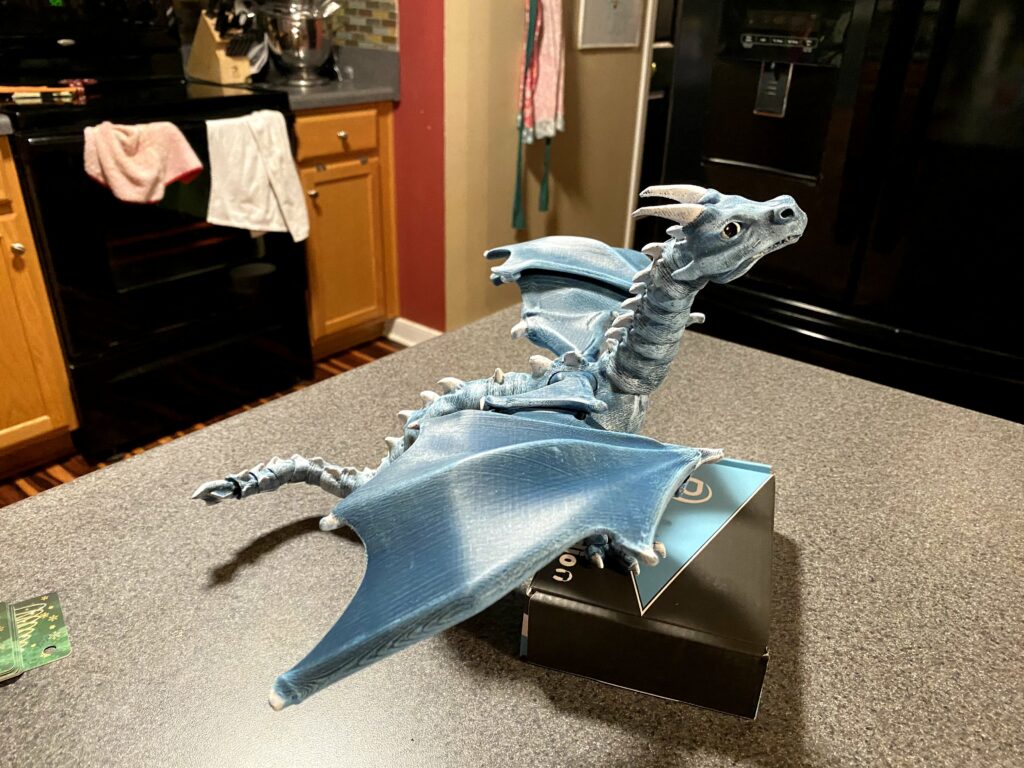
So, I found the perfect print project, downloaded it, sliced it up and started printing. This is when the waiting first began. Each piece ended up taking about 3-5 hours to print. There are 42 pieces (although, the tail and neck were roughly 10 pieces each and were grouped together for 2 prints)… a rough average on that one is ~80 hours of total print time! Yikes! Not to mention, I didn’t even think about the amount of filament I had available in a single color. I opted to use Hatchbox Silver PETG. This was a great lesson on determining how much filament you should have on hand before beginning a large print project. I did run out of filament on the very last piece. This happened to be a larger section of a wing, so I did have to reprint it. Unfortunately, the particular filament I had decided to use was no longer in stock on Amazon and appeared to be discontinued by Hatchbox. A rather large setback for a print job I hadn’t planned on painting.
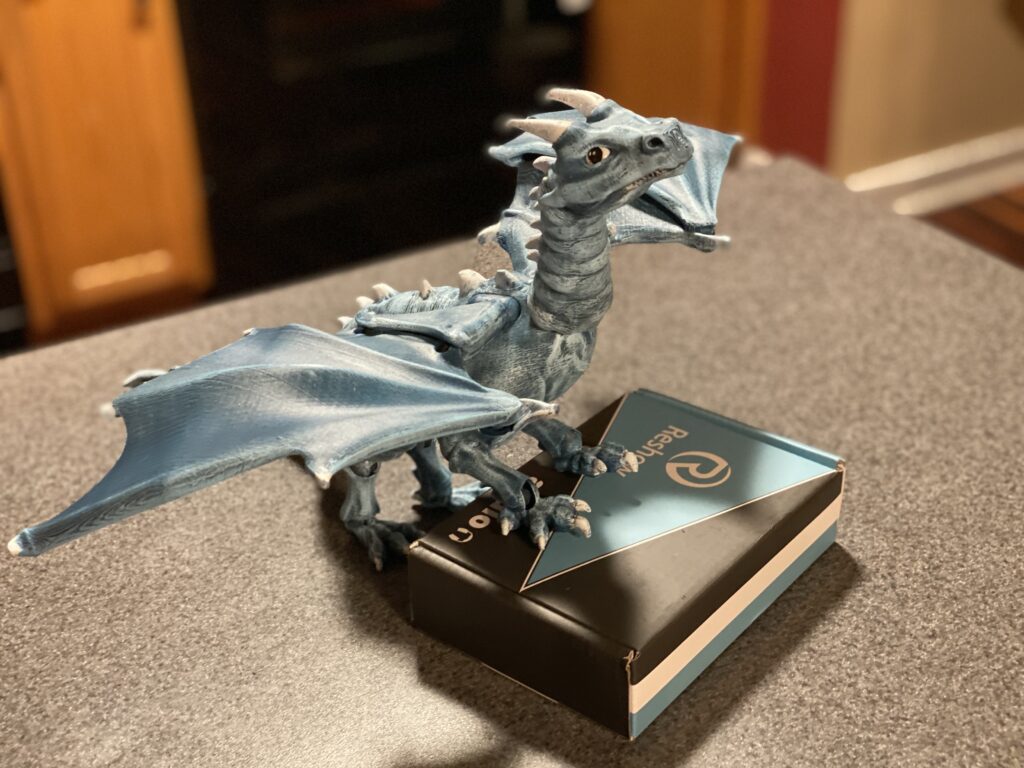
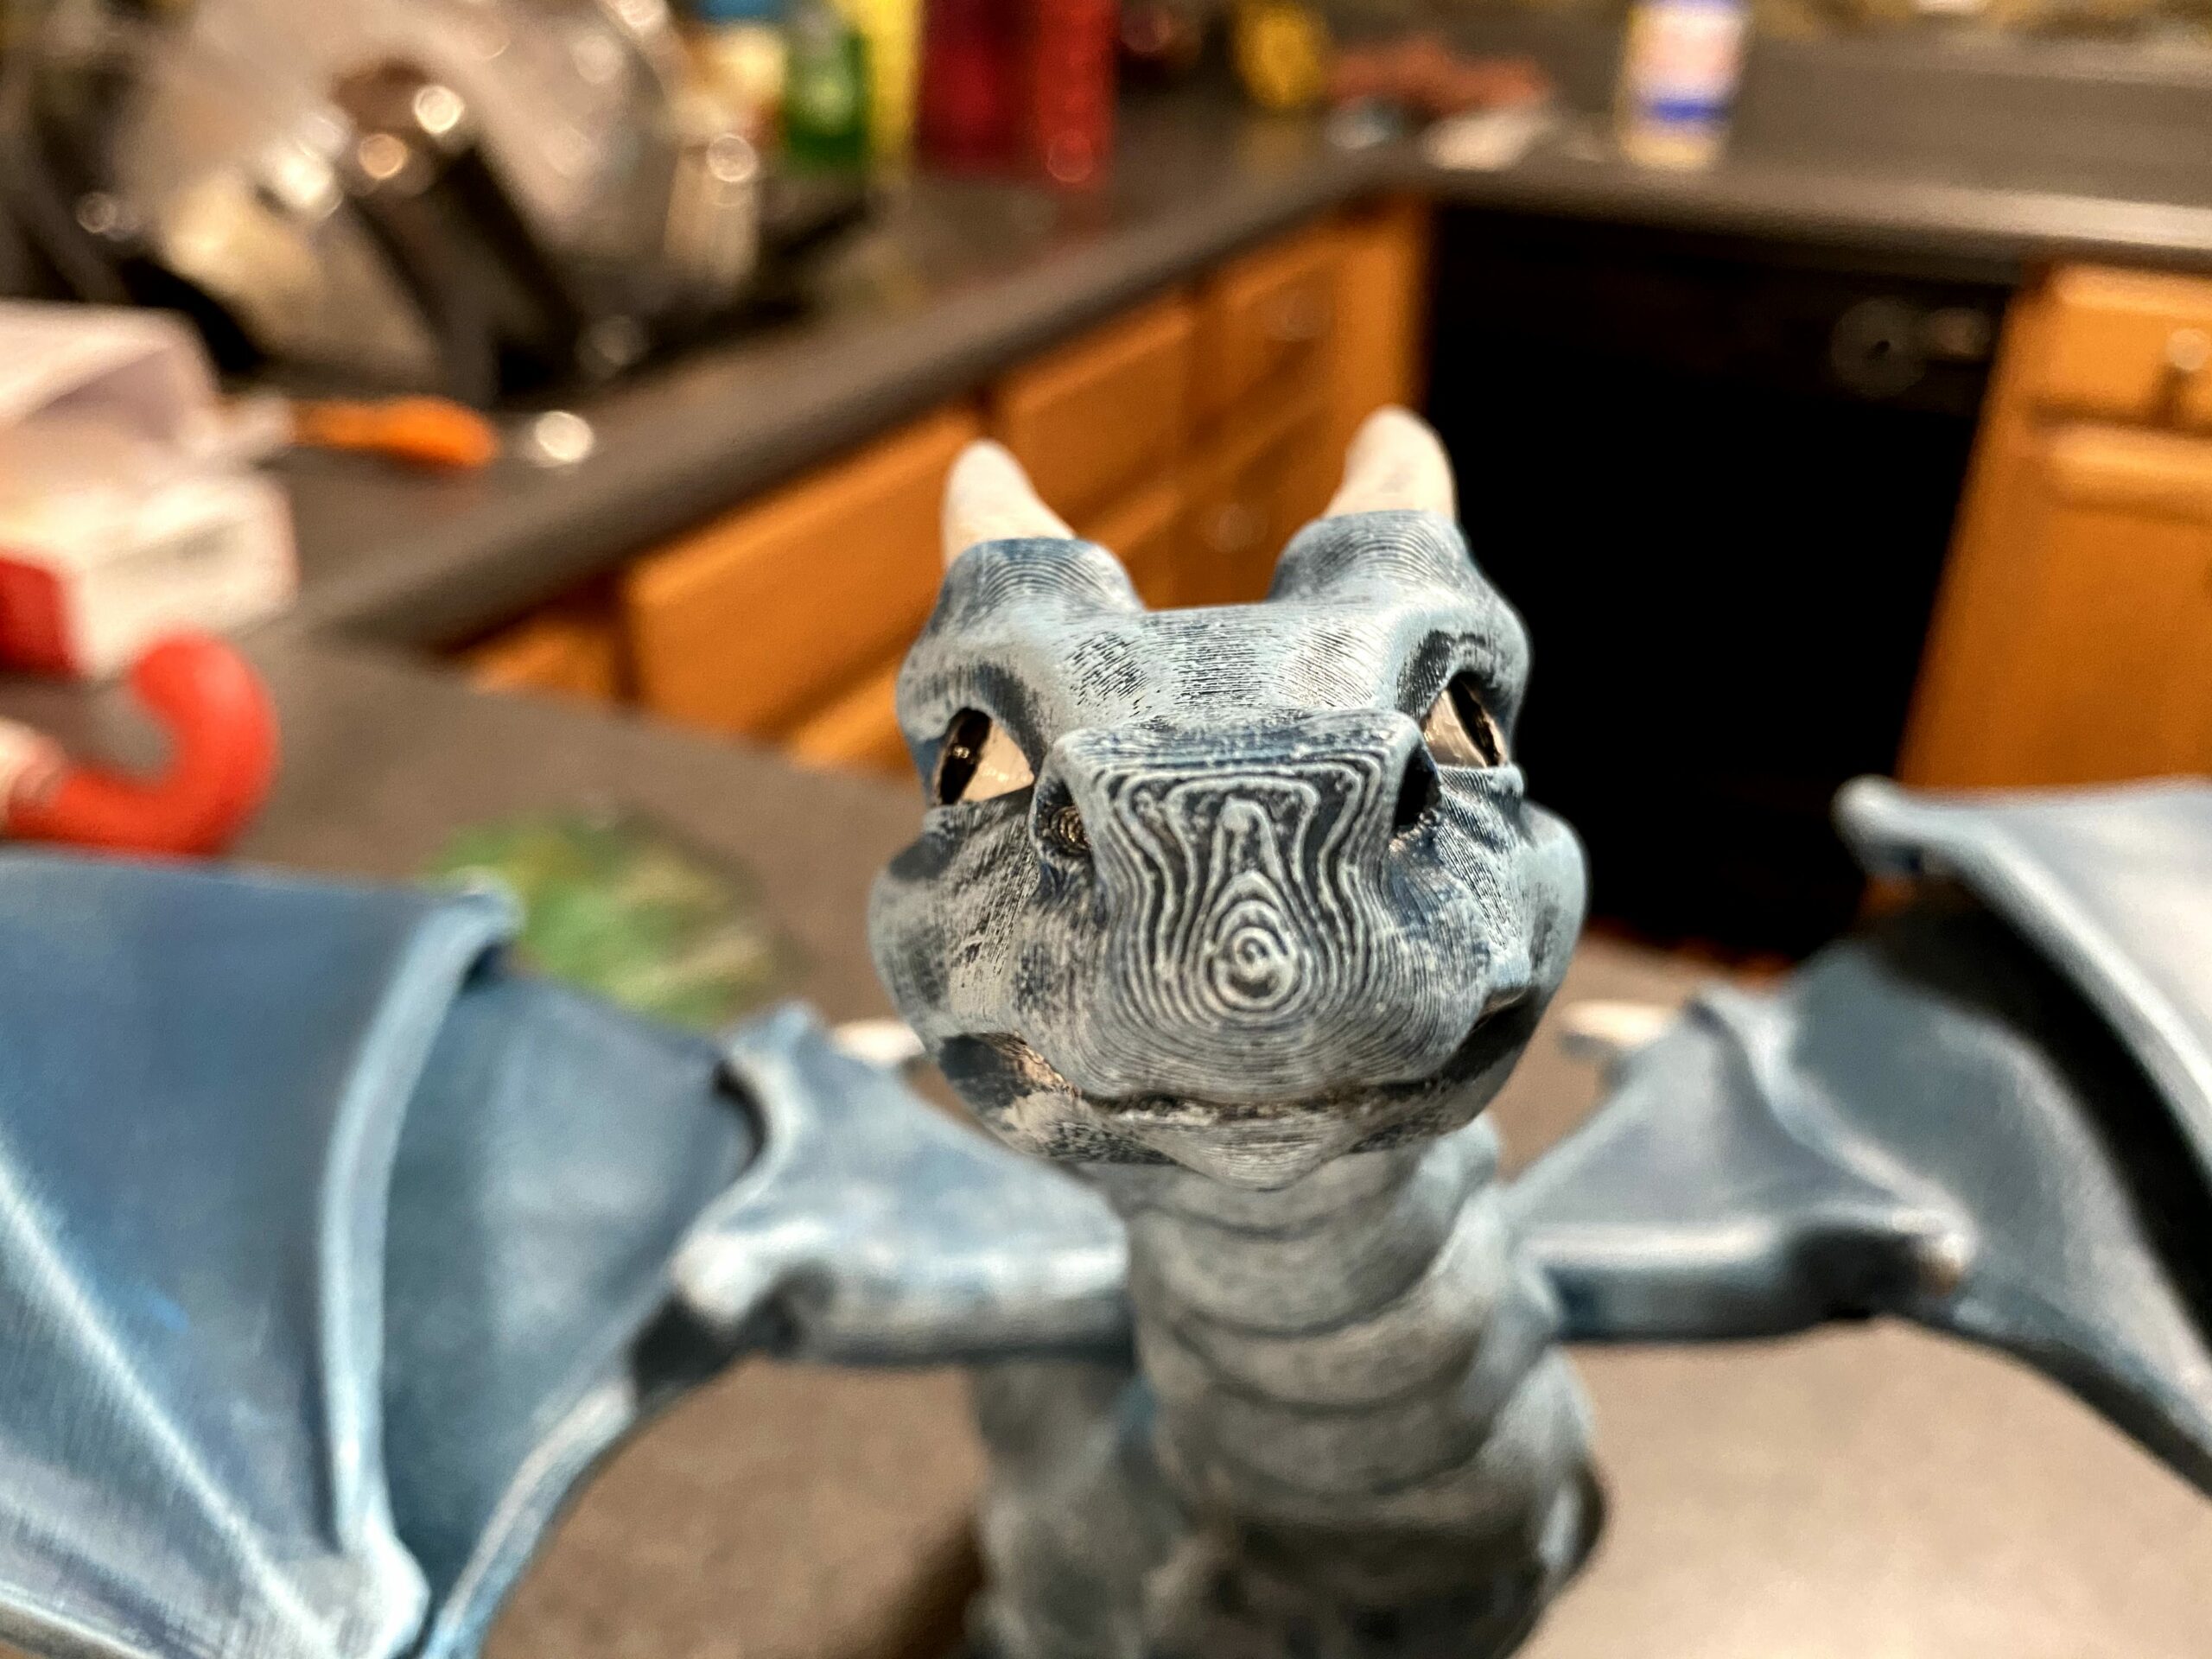
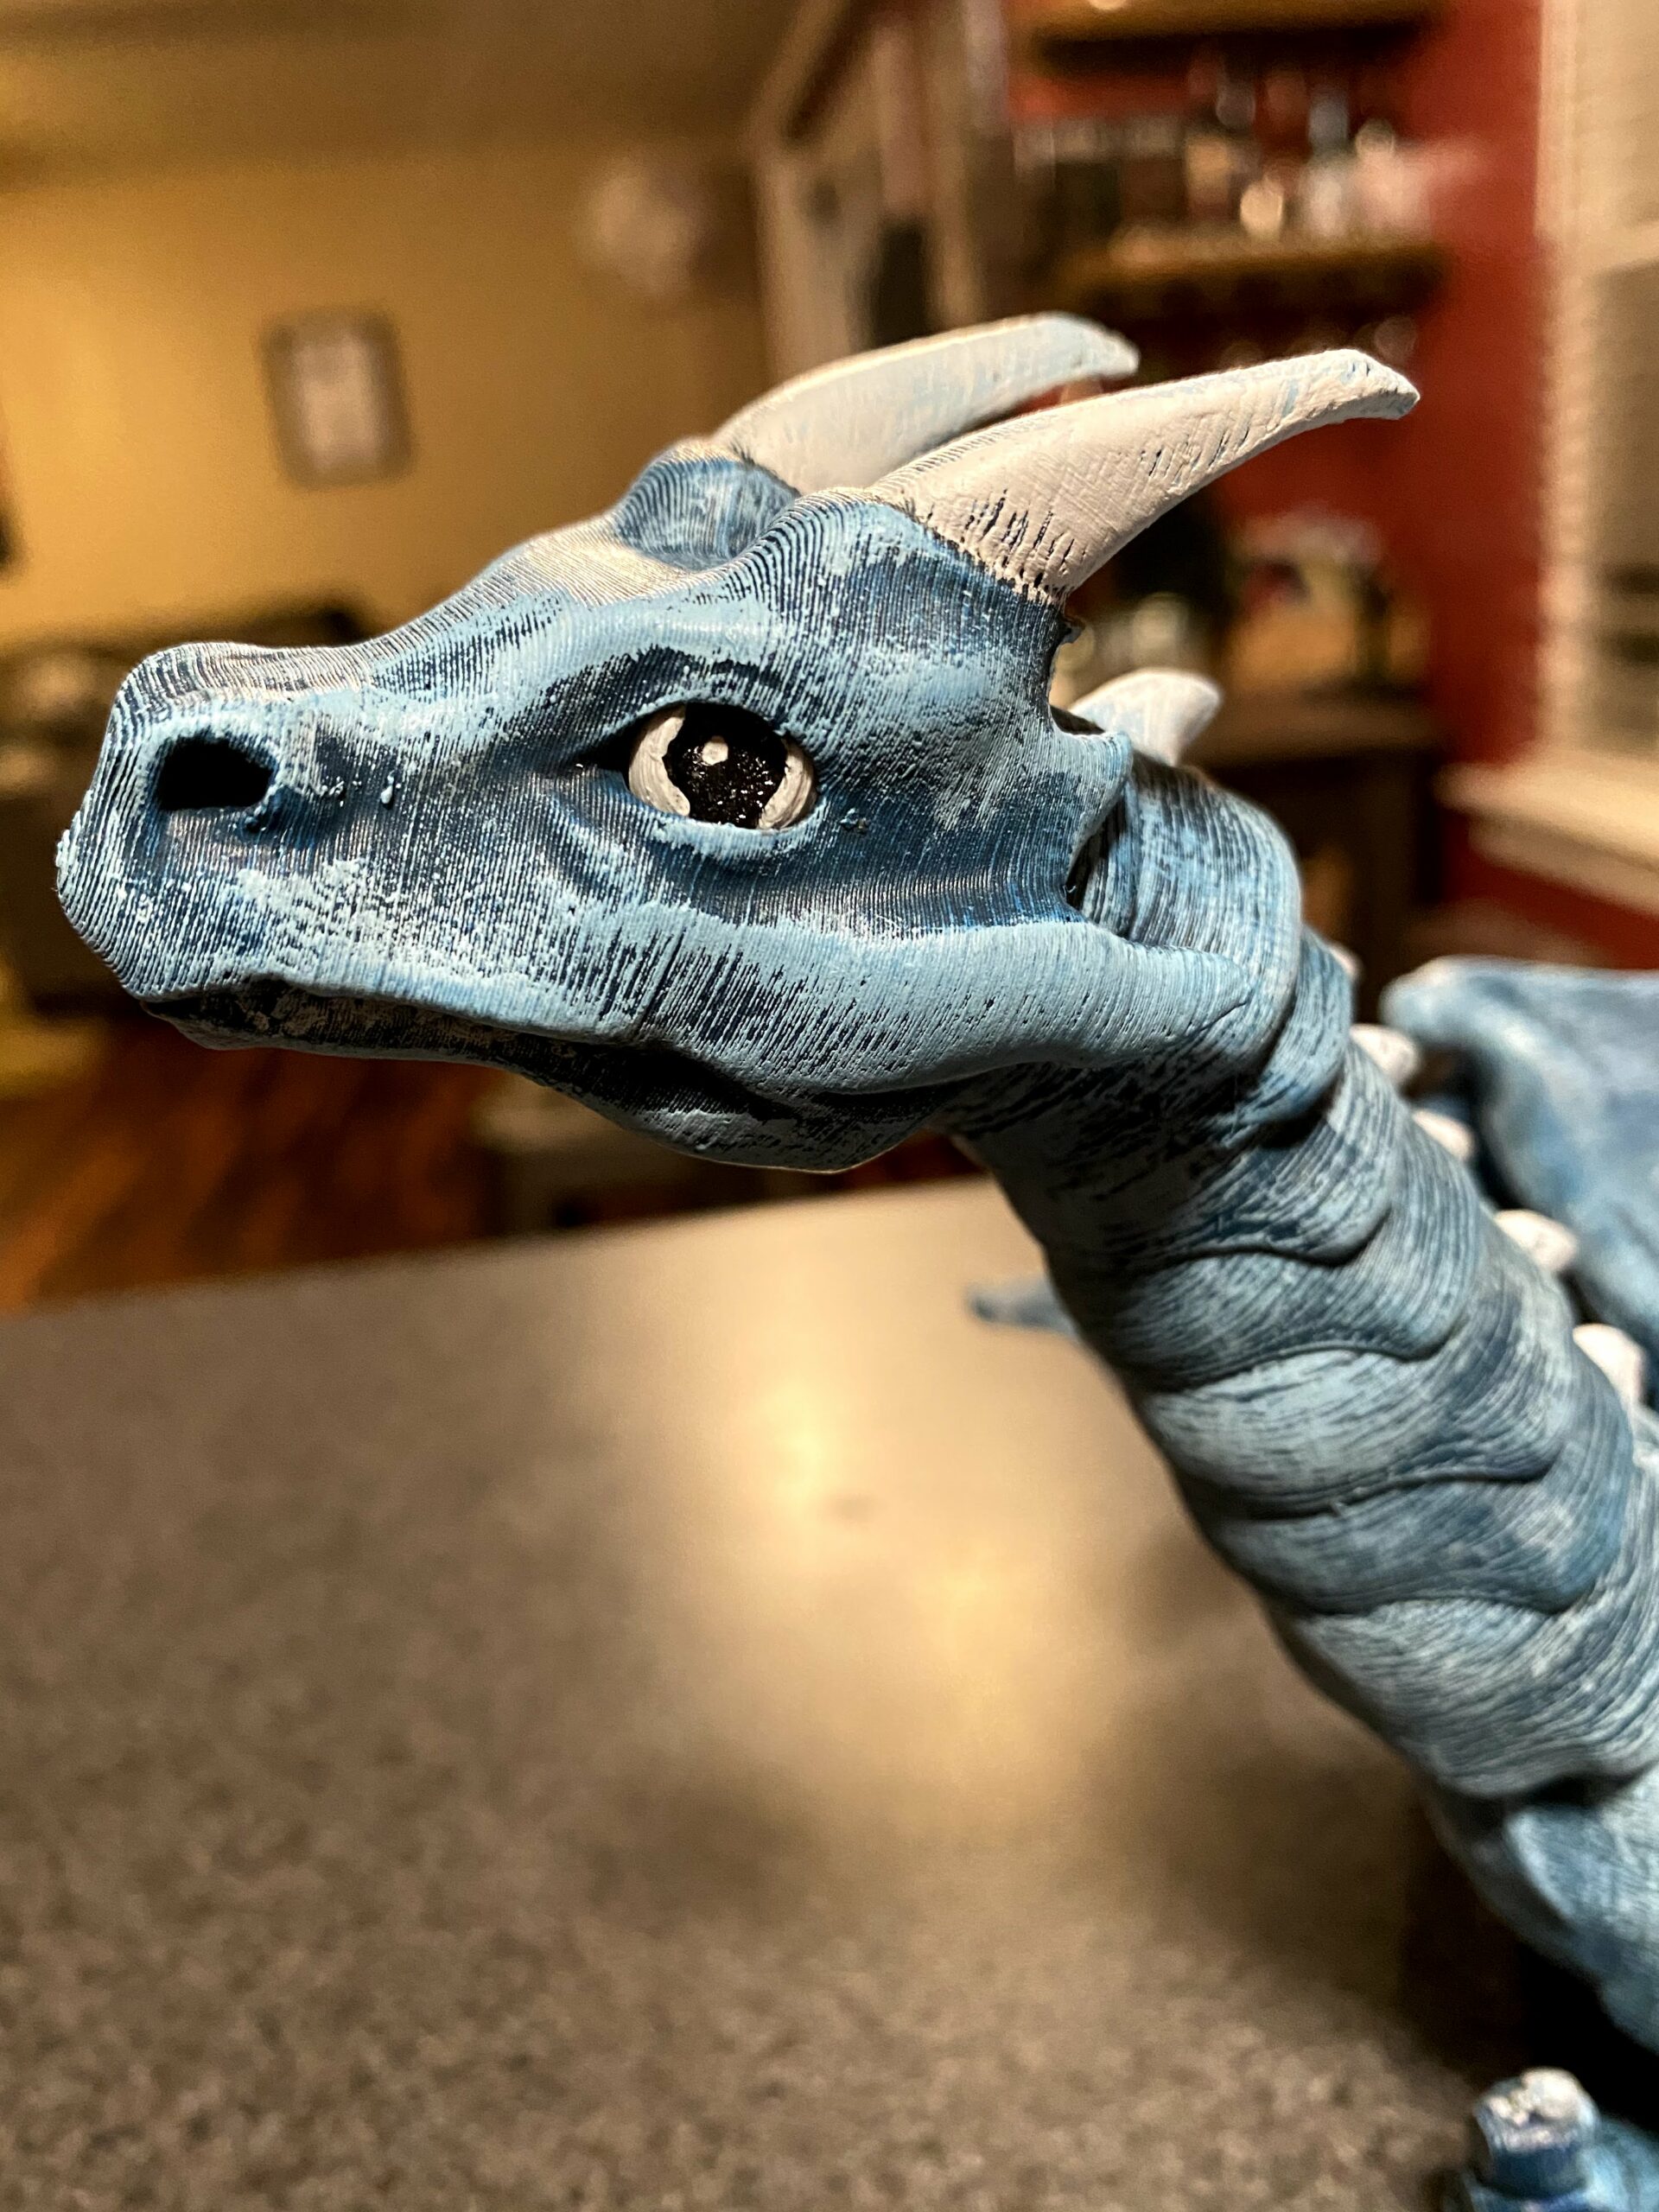
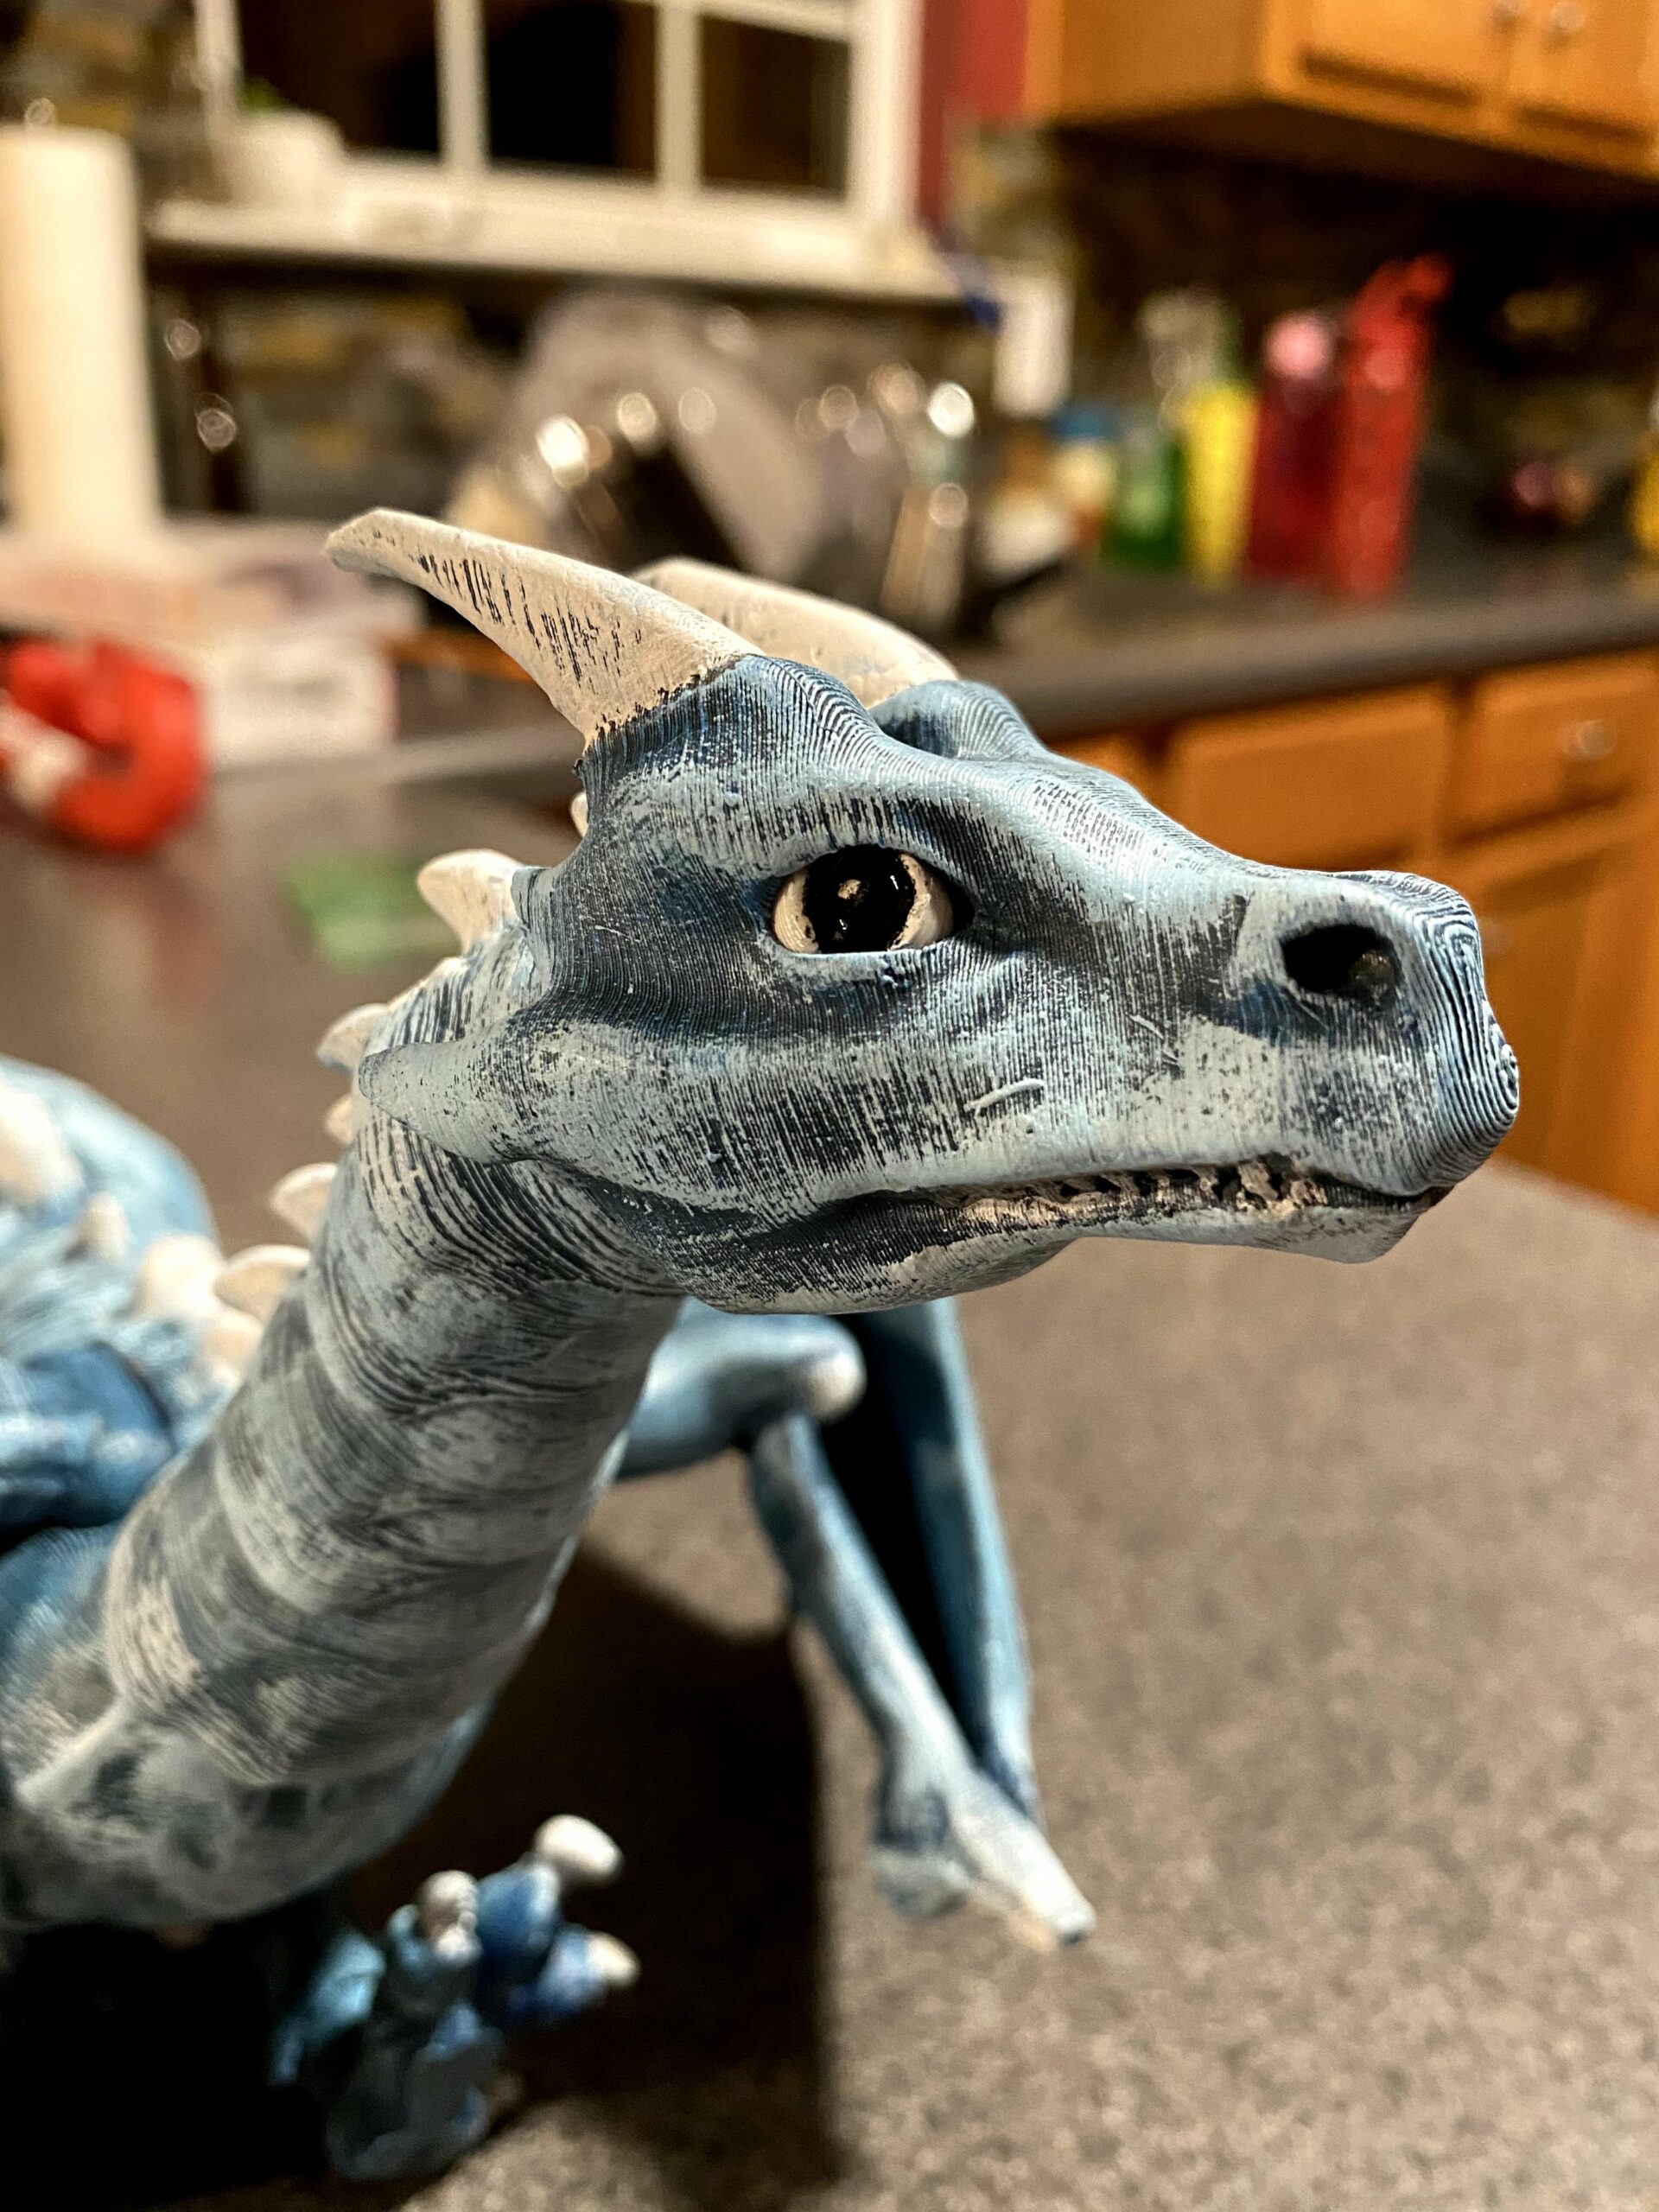
As with all challenges, you need to face them to overcome them. I ended up deciding to paint the dragon. It took 2 days to paint everything and I’m both surprised and ecstatic with the results! The paint job really brought the dragon to life with details that were definitely not present with the slightly shiny, silver PETG filament it was printed in. I did ask my mom what type of dragon was her favorite to get an idea of what colors I would need. At first, she wasn’t aware of different types of dragons. I gave her some options: ice dragon, fire dragon, water, earth… basically a dragon for each element. She chose the ice dragon and I had my color scheme (mainly light blues and some whites). Looking around at home, I had some acrylic paints. A deep blue, a lighter blue, a sky blue, and a really pale blue. I also had black and white for mixing to get just the right shade.
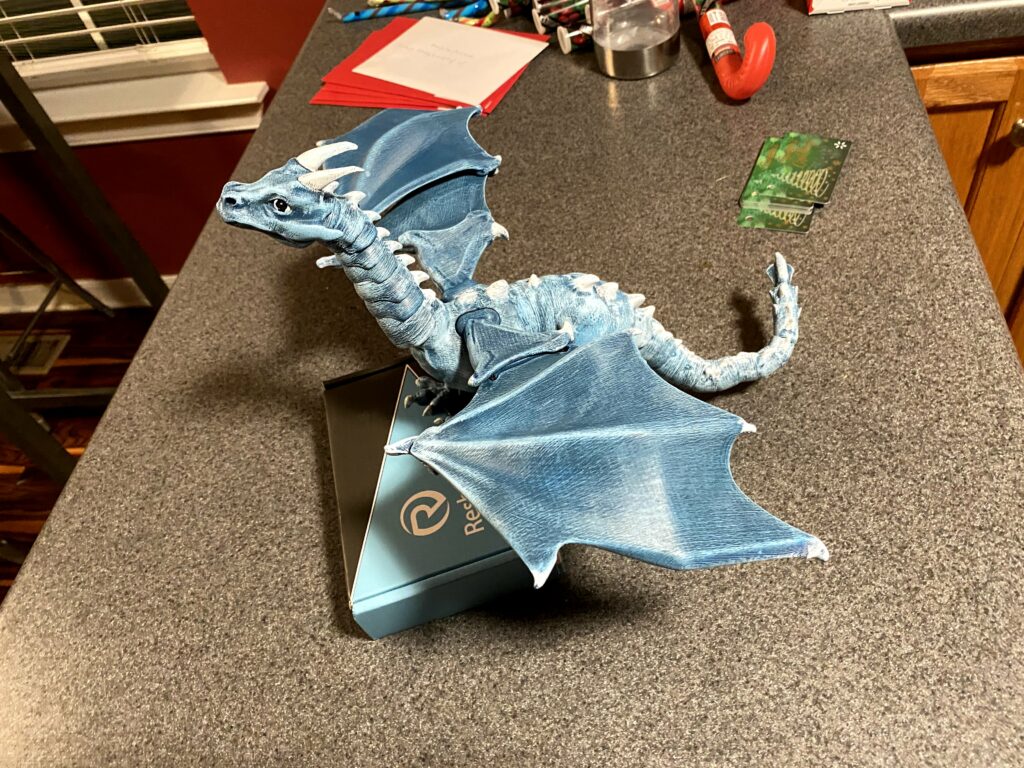
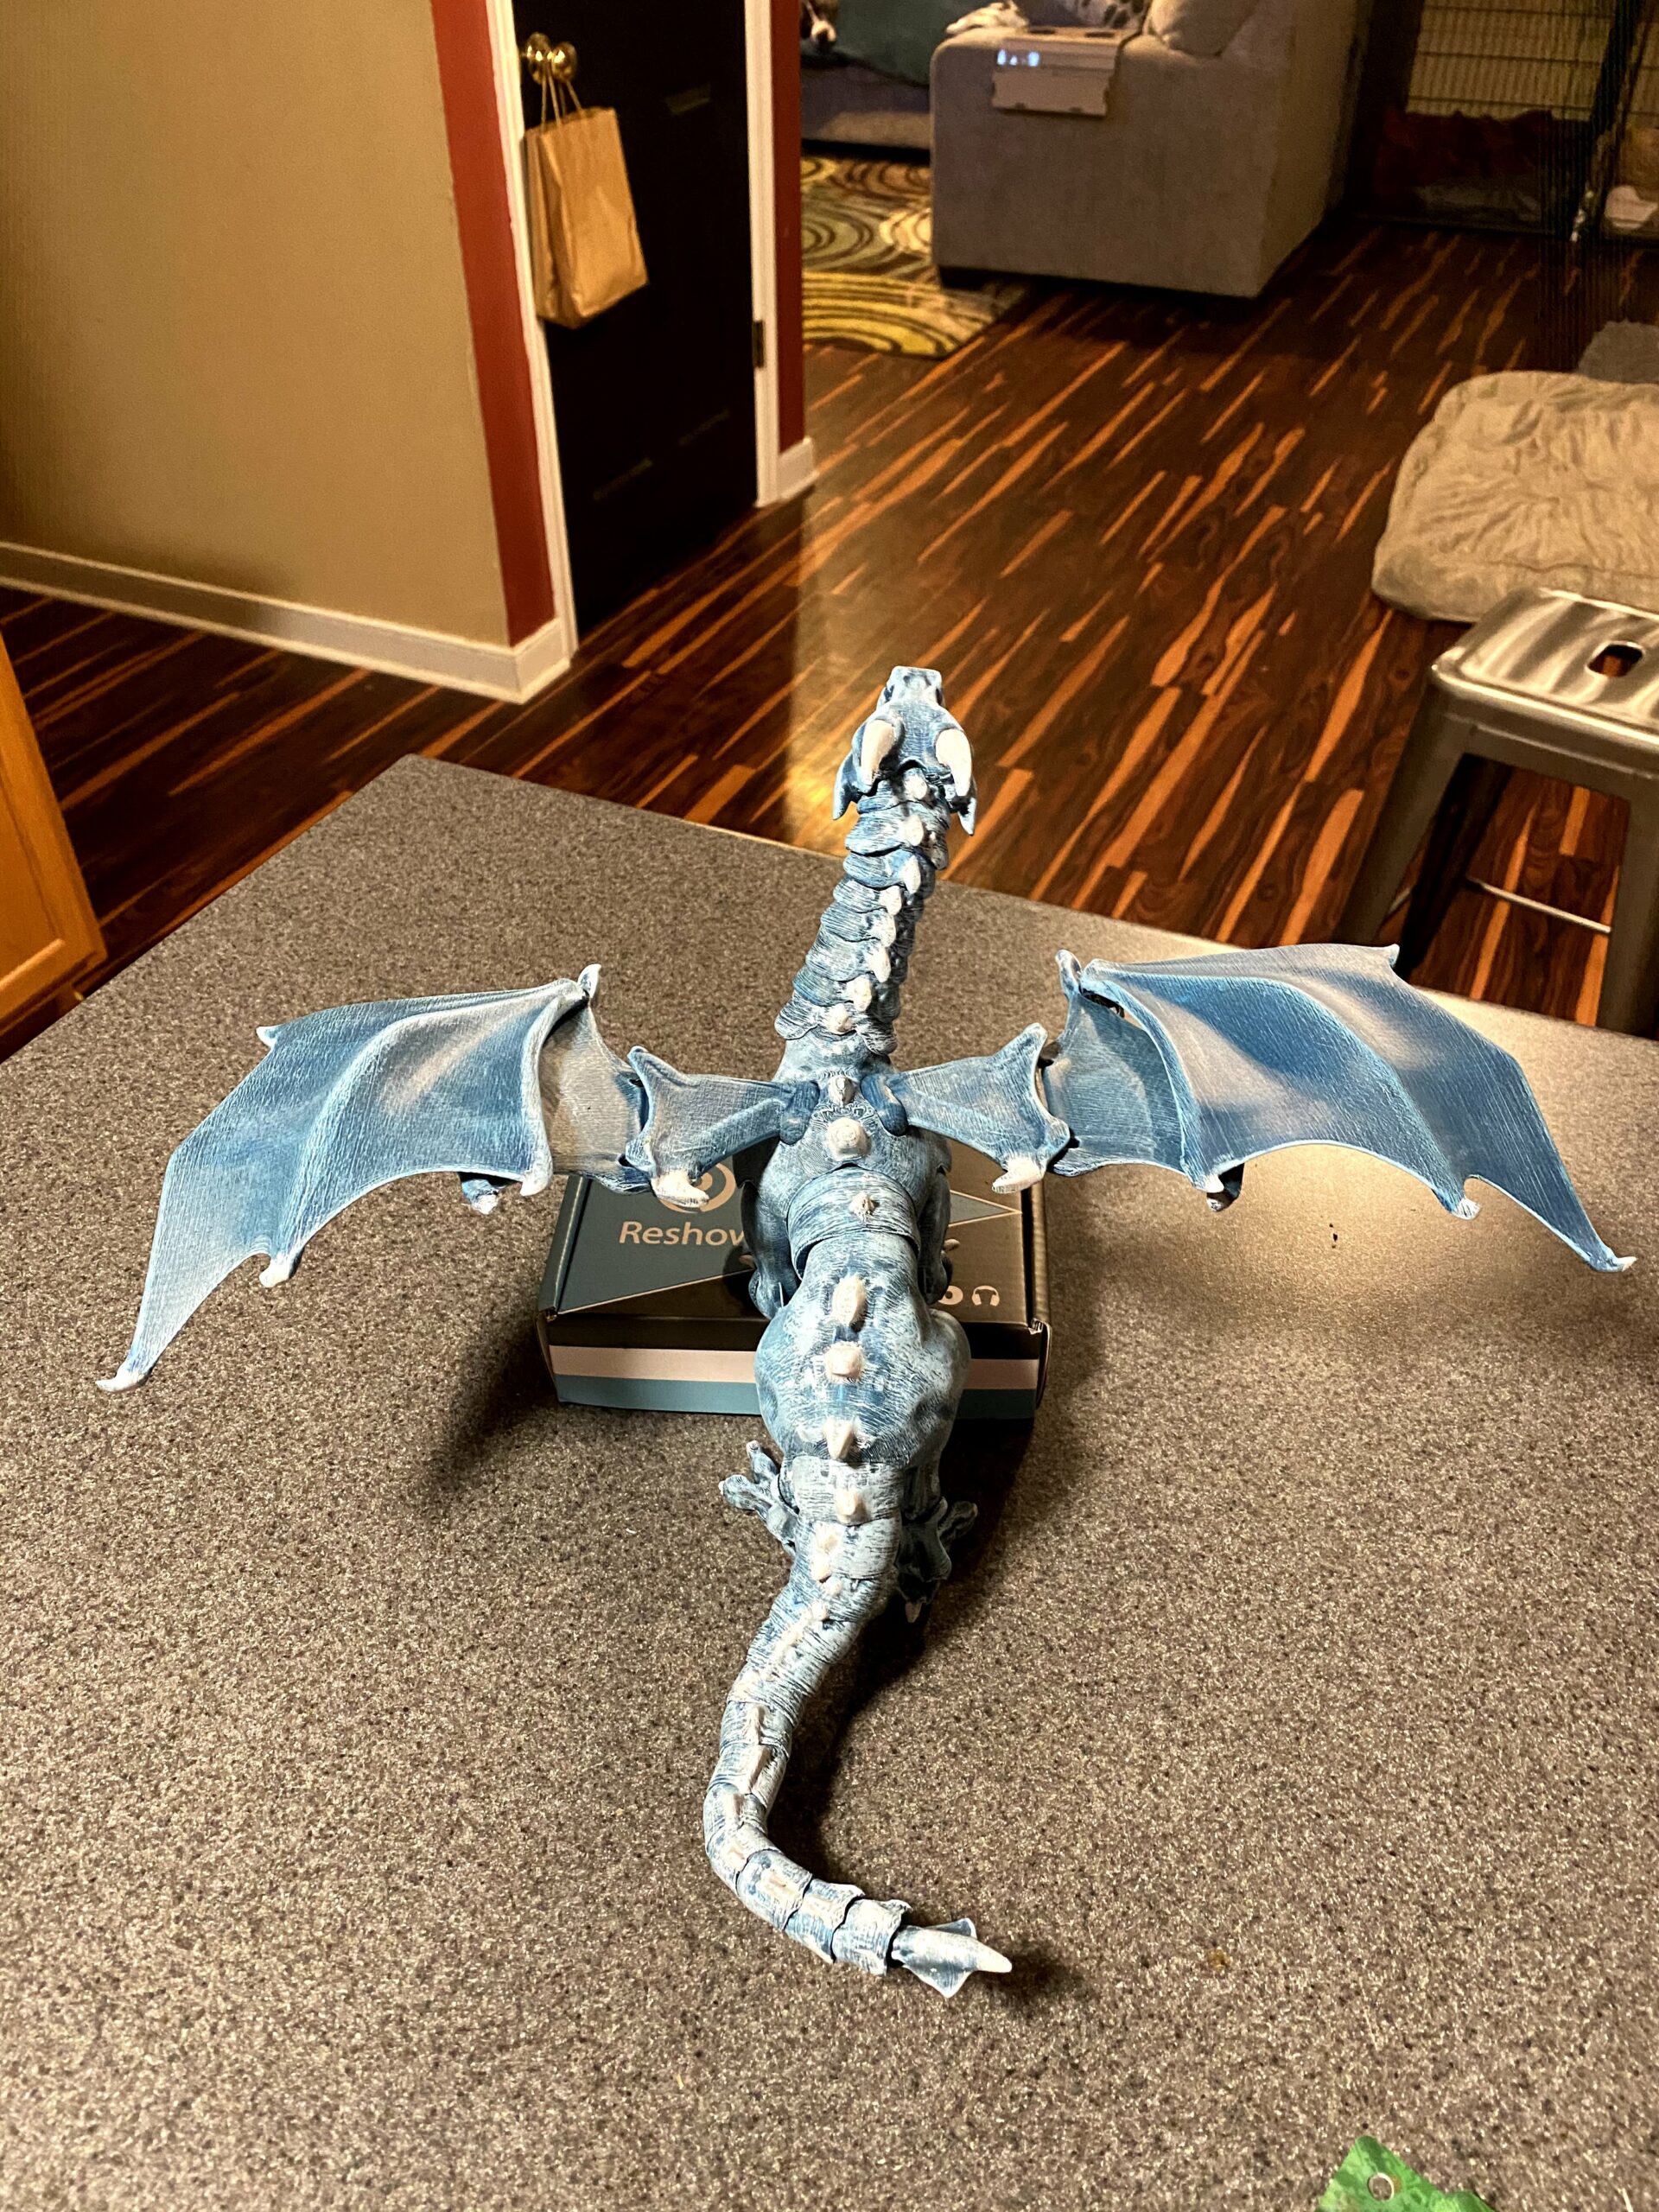
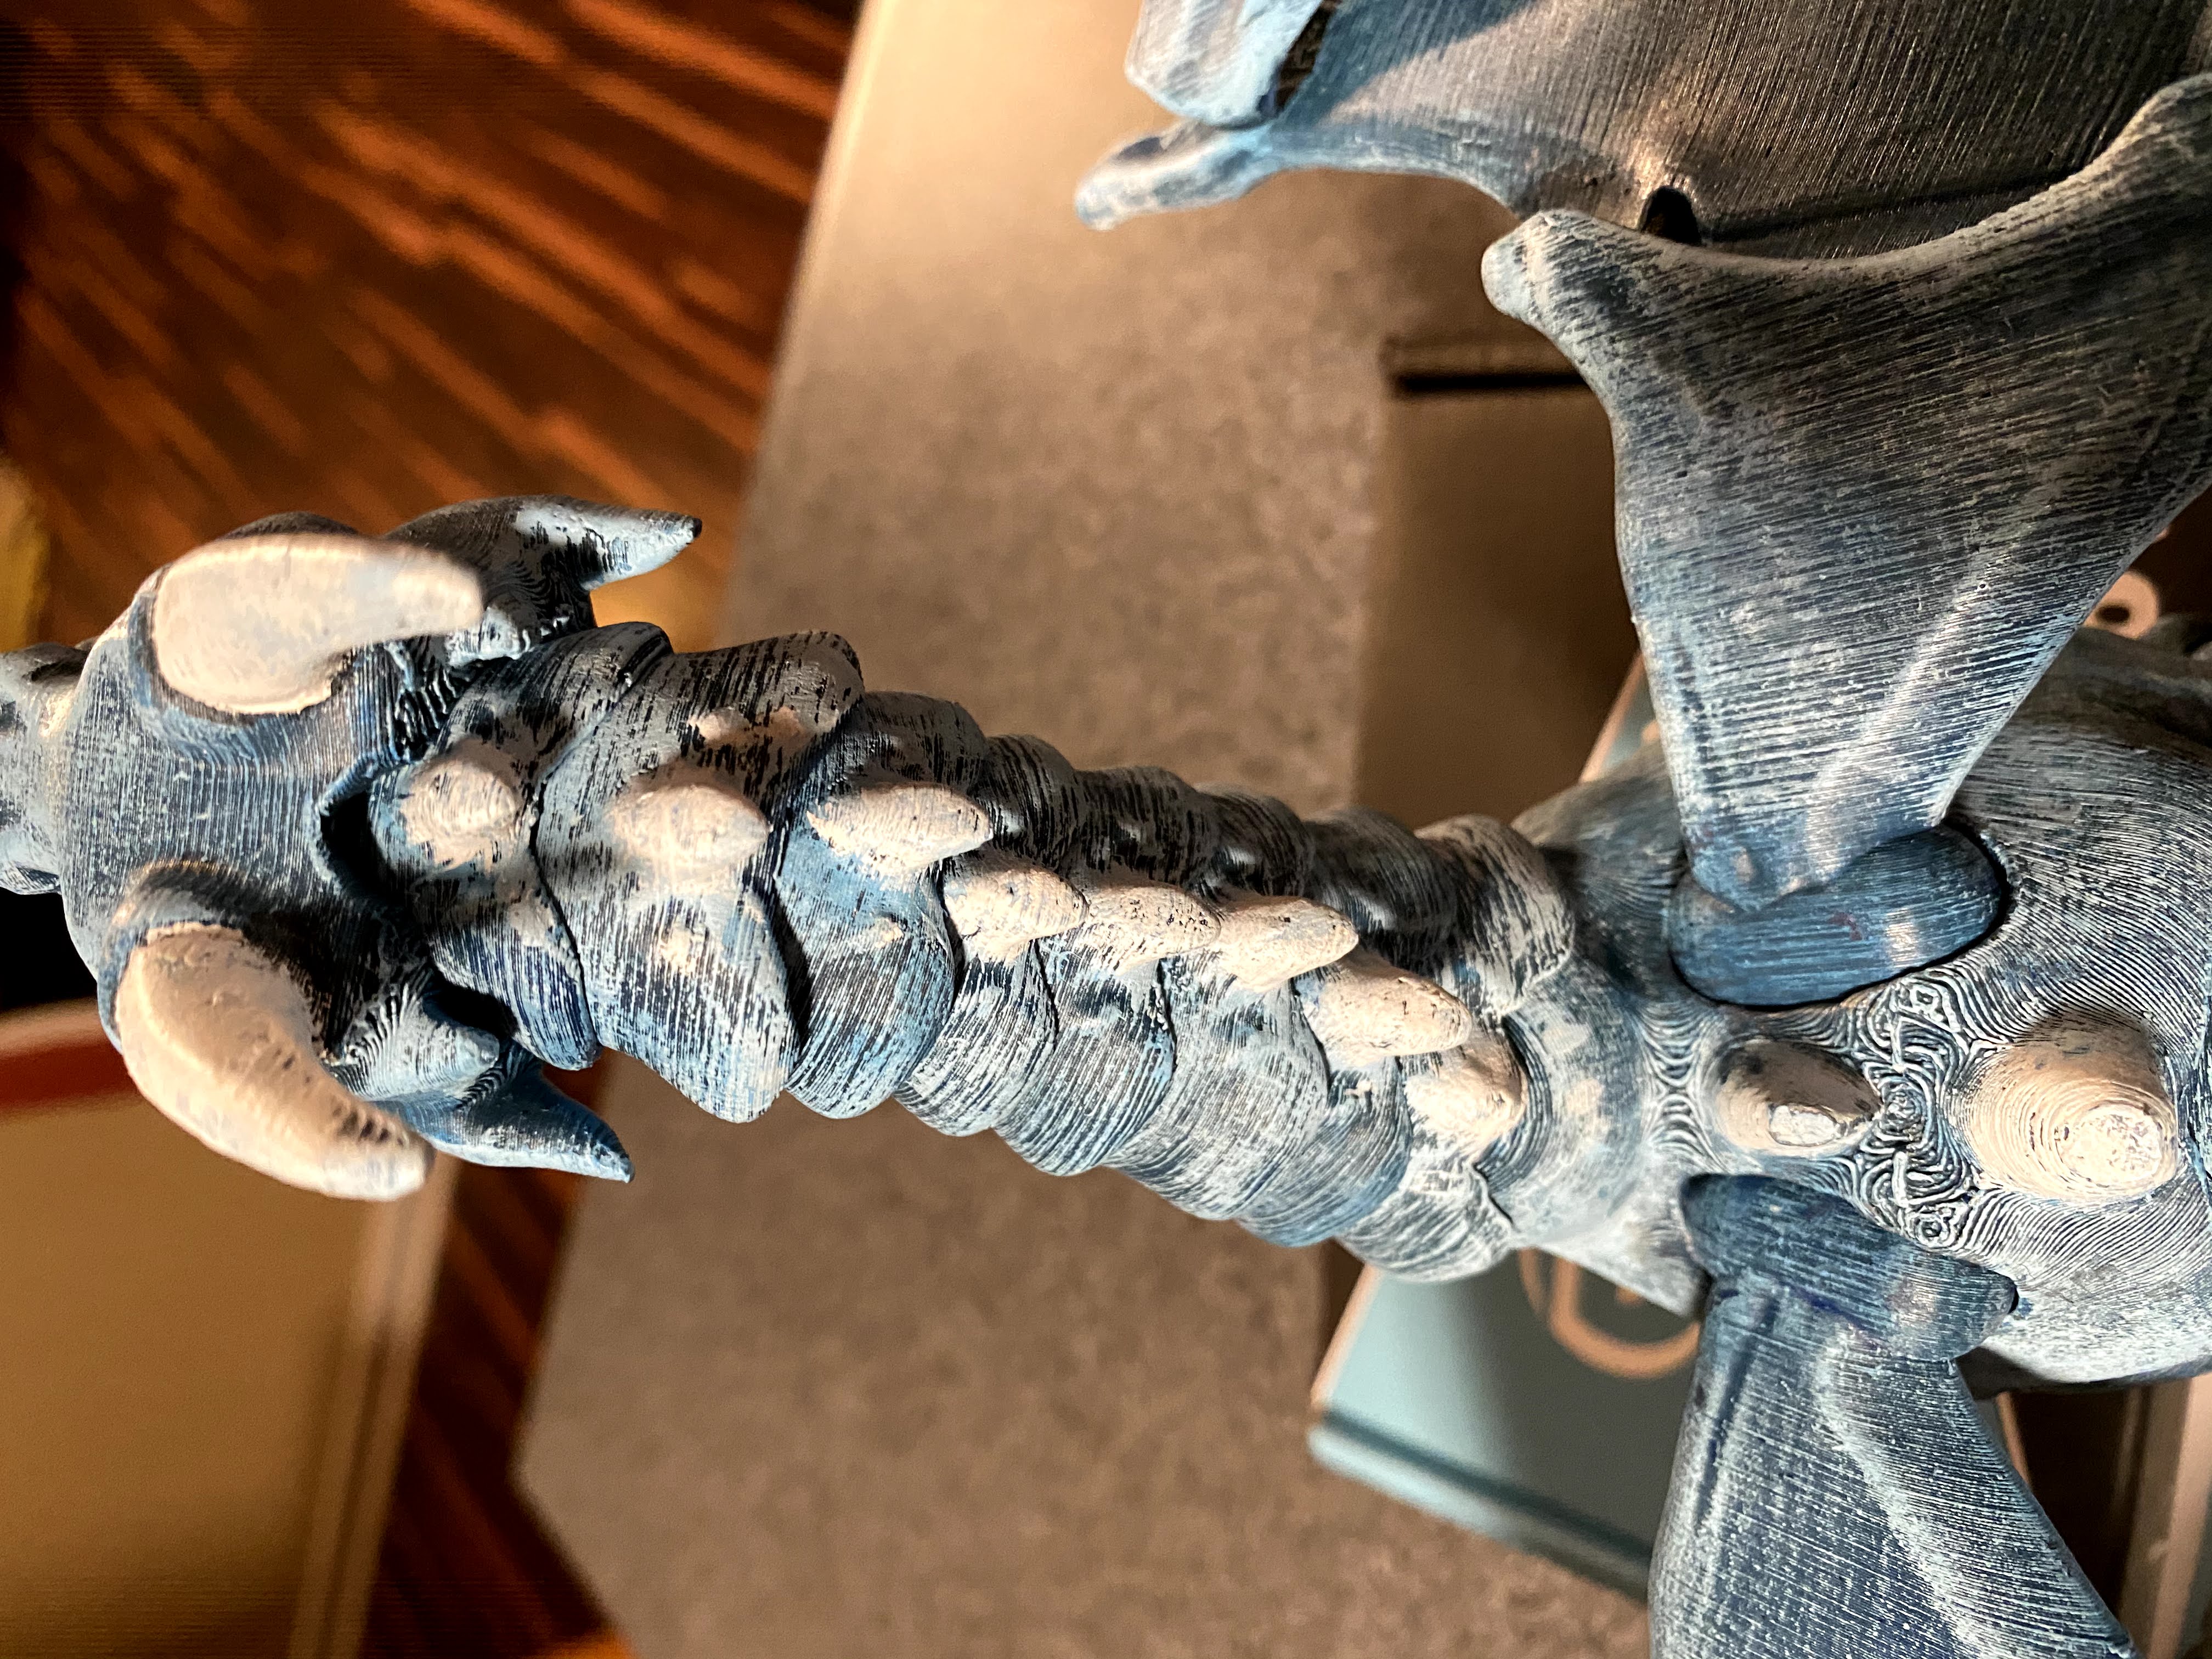
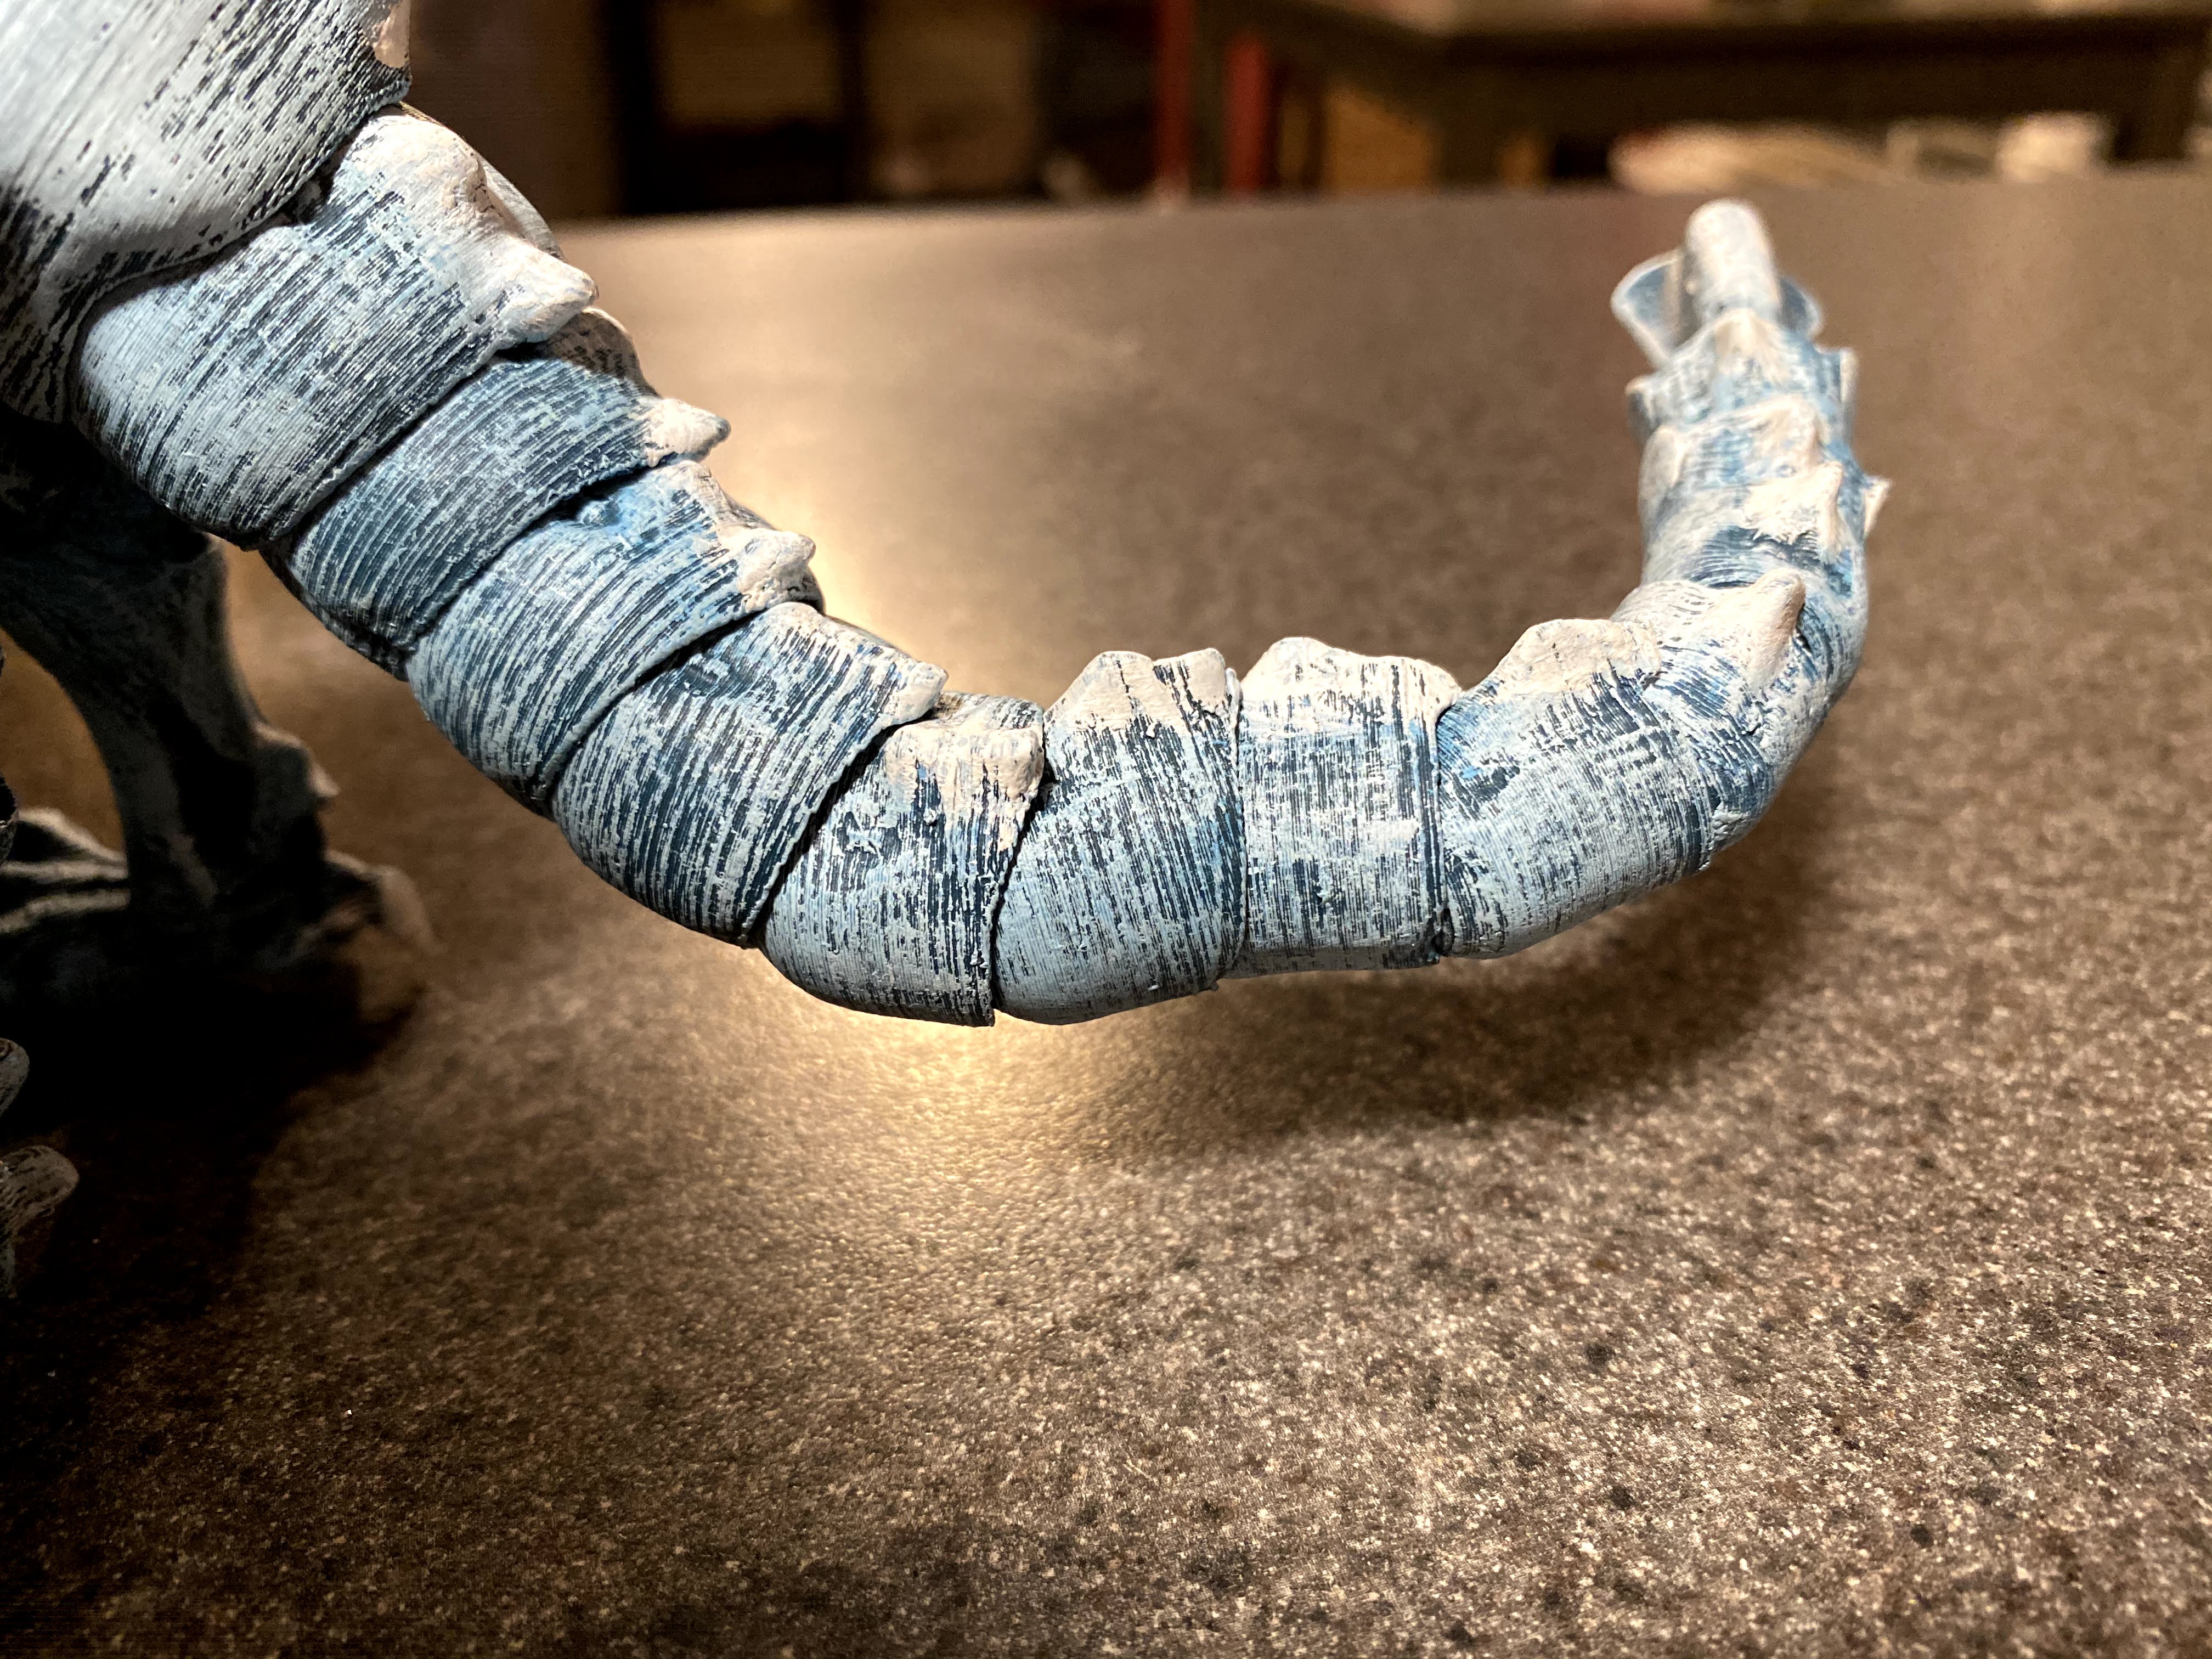
Other than the small box models you assemble with rubber cement and paint with the random paint that came in the box, I’ve never really painted a model since I was about 10. I’ve definitely never painted a model where I had to pick the colors. This was going to be interesting. I know some of the basics from just being in the same sphere as others that paint miniatures way better than I ever could, so I knew layering is key. I layers darkest to lightest, never using pure black or pure white. I started with a super dark blue as the base coat, let it dry then pretty much dry brushed every other coat on top of that. I had a solid lightish blue I worked with as the main color of the dragon. I continued dry brushing with a series of progressively lighter blue shades. I highlighted (darkened?) areas that would be shadowed with a thin wash of black to really give the crevices depth. These areas were underneath the wings, between the toes, and generally places where the sun don’t shine. I finished with a dry brushing of white on each of the horns and nails of the dragon to really give it the appearance of depth.
For the eyes I used nail polish to coat it. I first attempted white acrylic paint, but it just made the eyes look dead. So, I filled the pupil with black paint, added a white dot for life and did a top coat of clear nail polish to make it all glossy. I think the results turned out fine as the eyes breathed life into the model after it all came together. If I wasn’t time crunched, I would have painted layers on the eye with straight nail polish to give it a more rounded shape while maintaining glossy layering.
Some people prefer to sand their 3D printed objects to get rid of the print lines. These pieces had plenty of them given the massive size. I opted to not sand or remove the print lines, mainly due to time constraints and having a 5 hour reprint if I messed up a piece. I’m ultimately glad I did not remove the print lines as they unintentionally added the impression of scales with the paint job.
Assembly was rather simple, but I printed with supports and the directions had mentioned to not print with supports and to print with a bezel instead (something I also did not do). The internals of each piece were all full of support material. This is normally easy to remove, but, without direct access to the material, it was challenging. Even mores so was threading the elastic cord through the holes. I would opt for the smaller cord recommendation if I were to do this again as the thicker cord proved problematic for some pieces like the wing and the pre-connected thighs. After much frustration, needle nose pliers, some 18 gauge scrap wire, a file, a small screwdriver, and a lot of frustration I was finally able to thread the cord. I also wasn’t paying attention to where the knots would be after threading. Next time I would lay out the cord and plan my knots to be in less of a problematic area. The first knot was in a knee, which I’m almost certain will eventually pop out of the knee and show itself. Another was in a wing, which is also not ideal. I would try and hide all of the knots in the body of the figure as the cavity there is large enough to accommodate all of the knots while also not letting them escape. I would also try and find something to equalize the tension on all of the cords so they all have roughly the same tension after assembly. Tying them as tights as I could wasn’t too ideal as a snag could (and did) allow for less tension than desired.
All in all, this was an awesome project that tested many skills I didn’t know I had in me. The end result looked so good I was jealous that it wasn’t mine. I might do it all again in time. I definitely would care less about the print filament as I would intend to paint it in the end. The lessons I learned on this print will definitely carry over to others. I will also take more pictures and make more posts as the process unfolds to give you more insight into the entire process. I’ll post some follow-ups with more pictures of what I did get and explain each step in more detail. But, for now, I hope this inspired you to make your own Braq or try your hand at learning how to 3D print! I know after I started printing, I started seeing all the opportunity for applications.